- Downloading QuickScale
- Installing QuickScale
- Installing the .NET Framework
- QuickScale Portable
- QuickScale Updates
- Opening a drawing
- Calibrating (Known scale)
- Calibrating (Unknown scale)
- Change paper size
- Taking Measurements
- The Pages and Dimensions Panes
- Printing
- Changing colours
- Calculate Pitched Roof Areas
- Add areas together
- Add room volumes together
- Calculate a room volume
- Categories
- Export dimensions to excel
- Annotations
- Counting items
- Shuffle information to suit your BoQ
- Switch between perimeter and area
- Find a measurement
- Move a measurement point
- Keyboard shortcuts
- Check for updates
- Red text in the Dimensions column
- Scrolling and panning
- Zoom with mouse wheel
- Perimeter incomplete
Using QuickScale
Calibrating a drawing with an unknown scale
Open a drawing
In QuickScale, open a drawing.
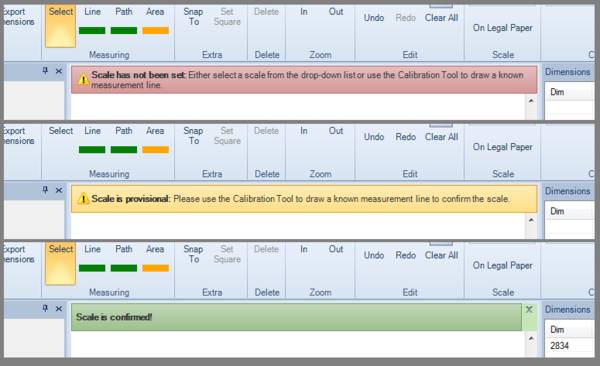
When you first open a new drawing in QuickScale, a red banner appears at the top of the drawing to tell you that the drawing's scale has not yet been set:

This is the first in a "traffic-lights" sequence that takes you through the simple calibration process: red means "not scaled"; amber means "provisionally scaled" and green means "scaled".
Draw a calibration line
As the scale of the drawing is unknown, we need to set the scale by drawing a calibration line using a known accurate site measurement. If the drawing does not contain any measurements you can use any item for which a measurement is known (e.g. door width, window width, etc.)
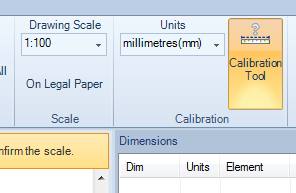
Navigate to that part of the drawing where you are going to draw your known measurement (zoom in to get a good clear view of the part of the drawing to be measured) and click the calibration tool button:
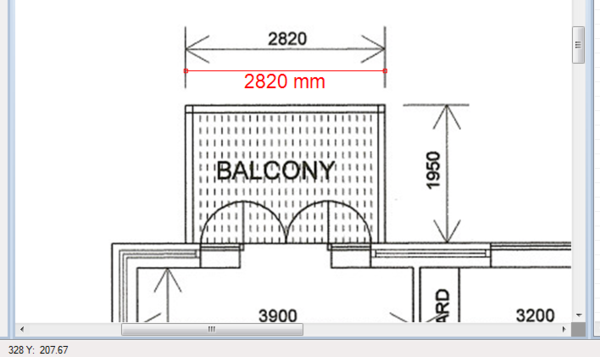
Now click one end of the measurement and the move the mouse to the other end and click:
The calibration dialog will now appear:
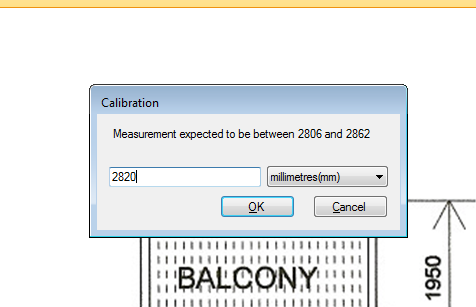
Enter the exact dimension or just click OK to confirm the measurement. The "traffic light" banner will turn amber to indicate that we now have a provisional scale.
Repeat the "Draw a calibration line" process using another known measurement. The "traffic light" banner should now turn green to indicate that we now have a confirmed scale.
That's it. You should save the calibrated drawing now and you are ready to take-off all the measurements you need or print the drawing to scale.